
Keeping your hosting account active requires timely Razorhost invoice payment. This guide walks you through the full process—from logging in to confirming payment—so your websites remain live without interruption.

Razorhost Invoice Payment: Step-by-Step Guide
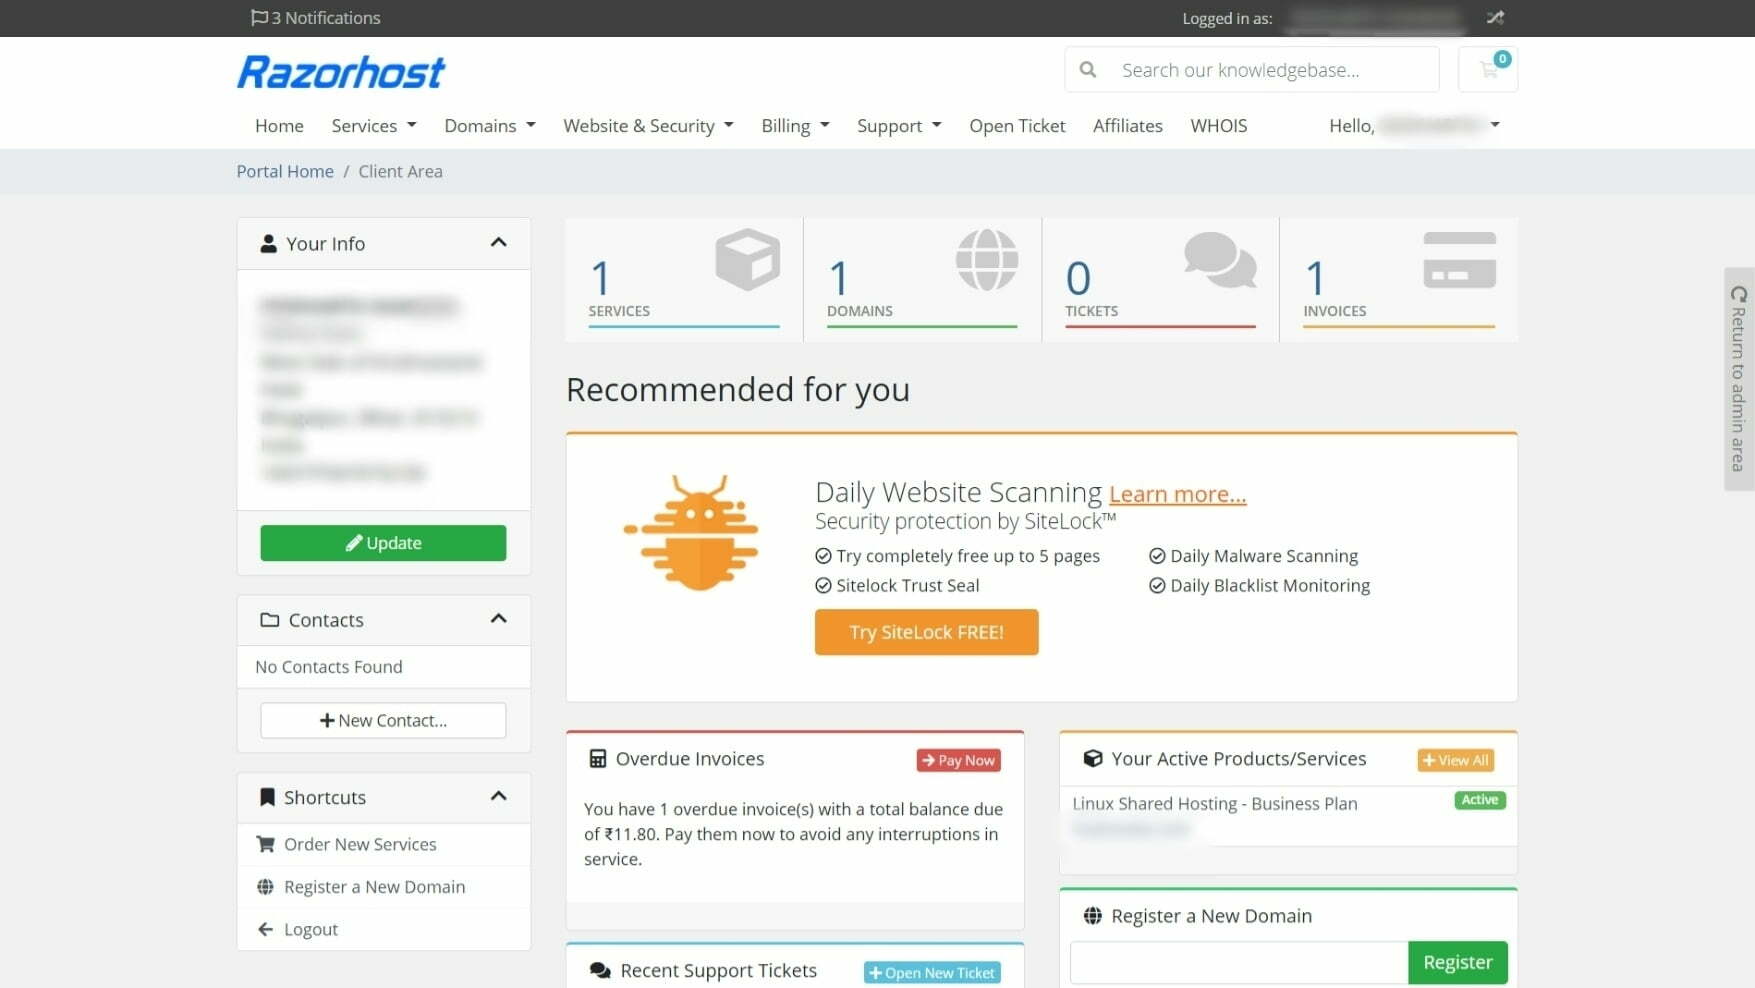
1) Log in to the Razorhost Client Area
Start by logging into the Razorhost Client Dashboard using your registered email and password.
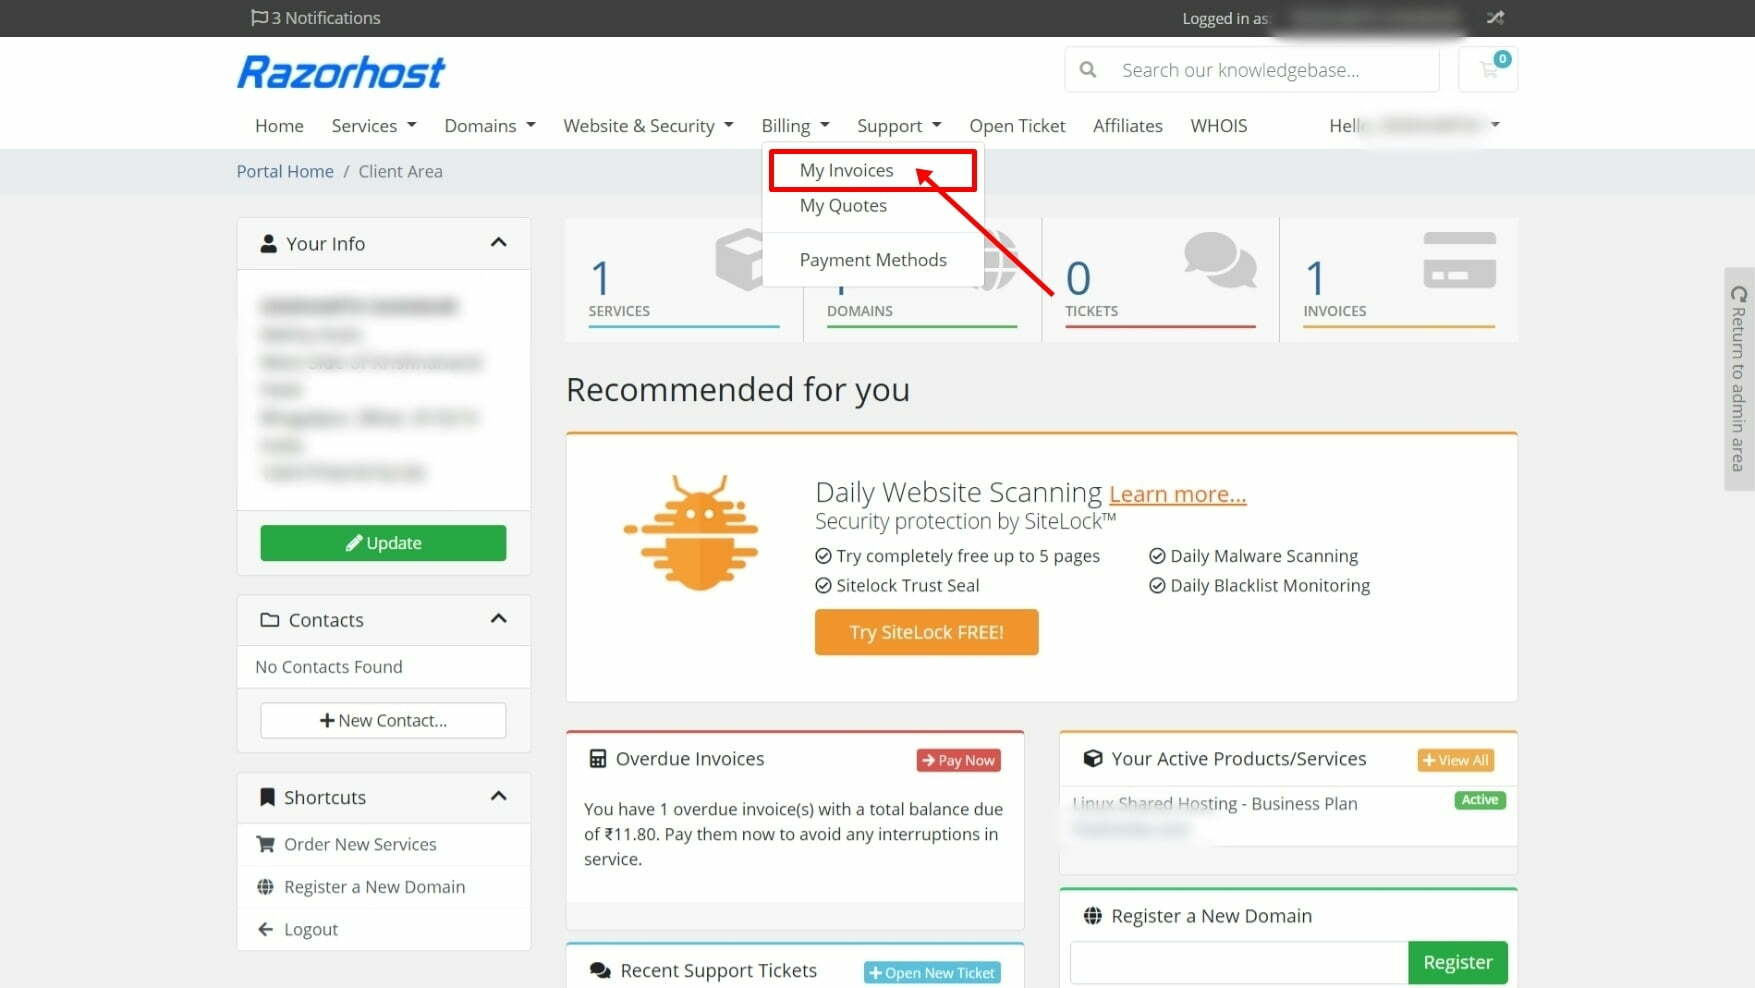
2) Open Billing → My Invoices
After logging in, click Billing from the top menu and select My Invoices. This section lists all your billing history in one place.
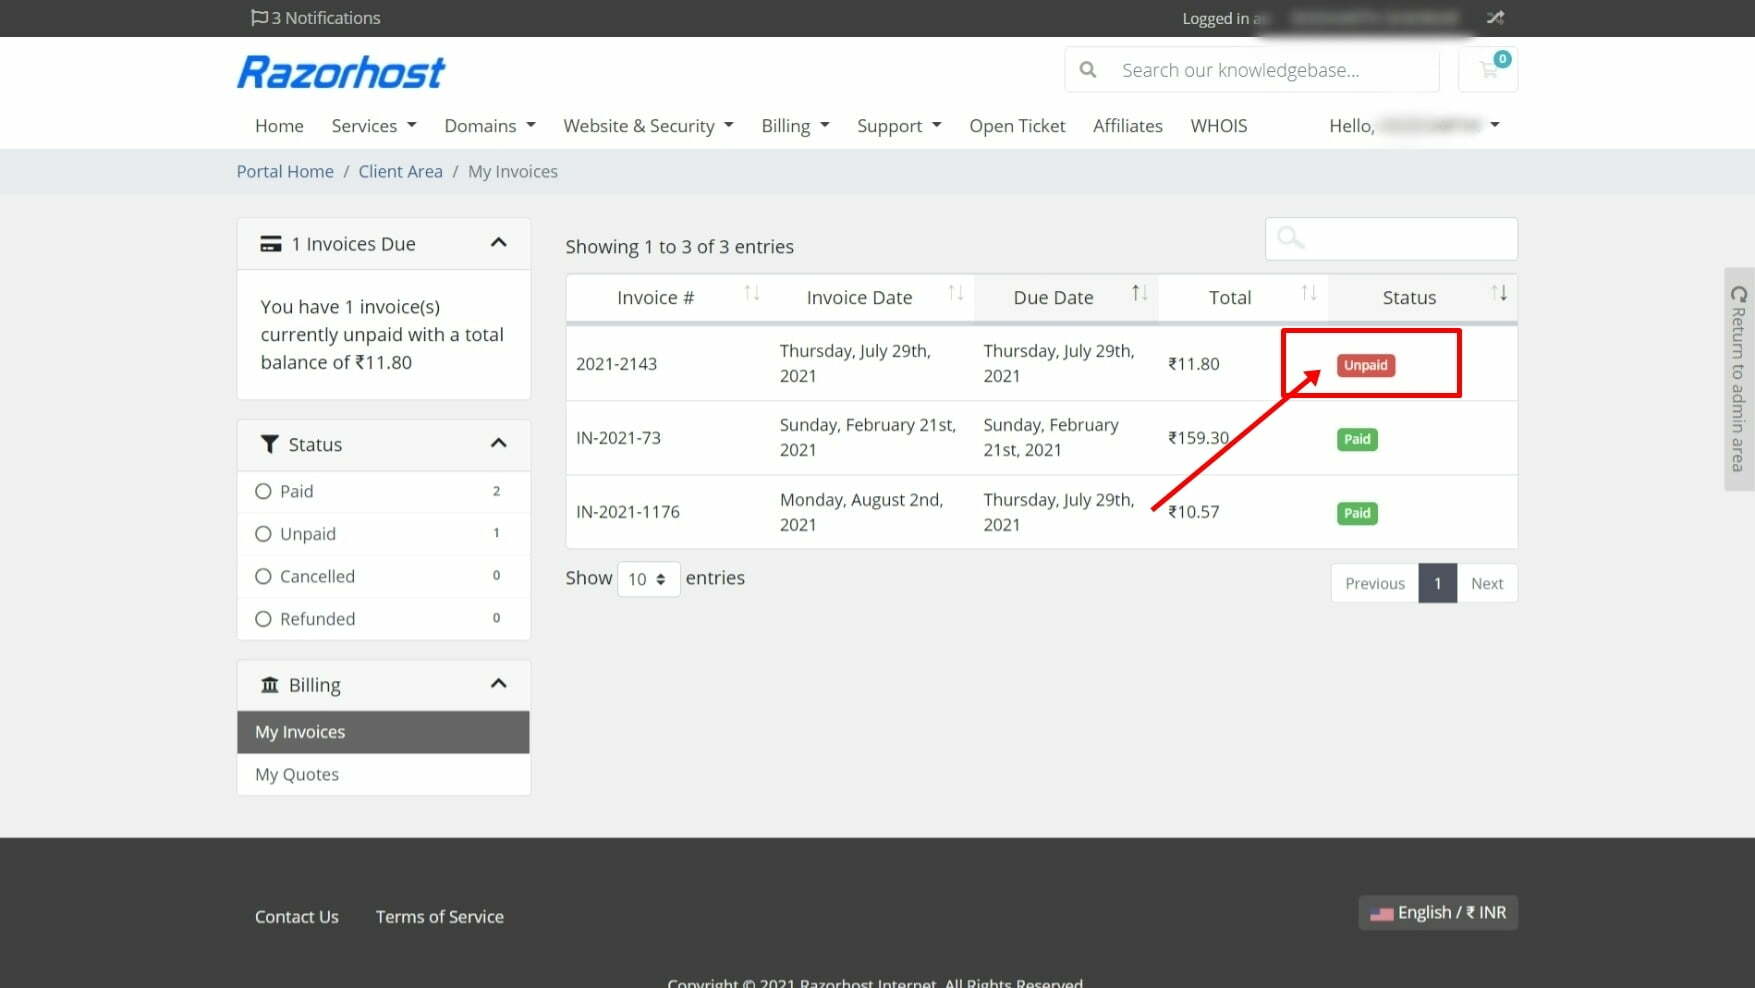
3) Review Your Hosting Invoices
On the My Invoices page you will see important details including:
- Invoice Number
- Invoice Date & Due Date
- Total Amount
- Status (Unpaid, Paid, Cancelled, Refunded)
Click the invoice marked Unpaid to continue to payment.
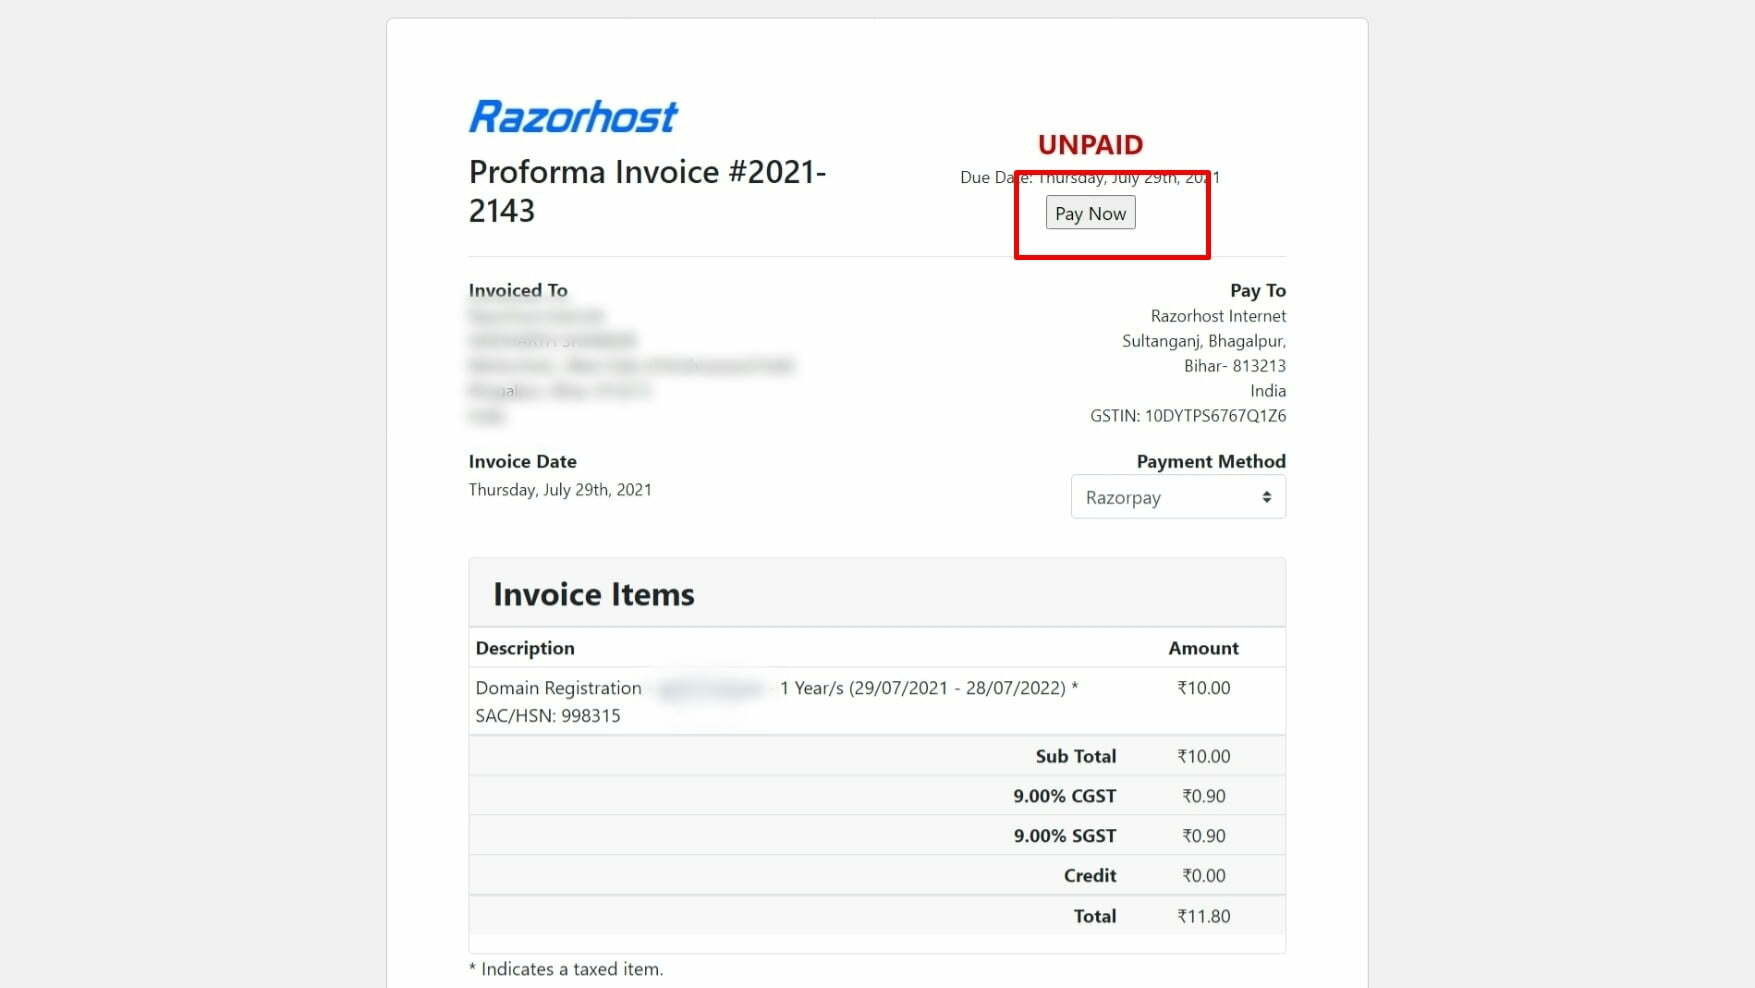
4) Click Pay Now and Choose a Gateway
Open your unpaid invoice and click the Pay Now button. Razorhost provides secure payment options for both Indian and international customers.
Available Payment Gateways
Razorpay (India)
Pay with Debit/Credit Cards, Netbanking, UPI, Wallets, EMI, Bank Transfer, or Pay Later. More details at Razorpay official site.
PayTM (India)
Supports Cards, Netbanking, UPI, and PayTM Wallet transactions.
Stripe (International)
Secure international payments with credit cards accepted globally.
5) Confirm Your Razorhost Invoice Payment
Complete your transaction through the selected gateway. Once processed, your invoice status automatically updates from Unpaid to Paid in the Razorhost billing panel.
Why Timely Razorhost Invoice Payment Matters
Paying invoices before the due date is crucial. Here’s why:
- Prevents suspension or termination of hosting services
- Keeps your domain and hosting active without downtime
- Maintains website uptime and performance
- Ensures secure, real-time updates to your billing records
Next Steps & Helpful Links
After completing your Razorhost invoice payment, you can manage services or explore new hosting options:
FAQs: Razorhost Billing & Invoices
How do I make a Razorhost invoice payment?
Log in to your client area, go to Billing → My Invoices, select the unpaid invoice, and click Pay Now to complete the payment.
Which payment methods are supported?
In India, Razorpay and PayTM support Cards, Netbanking, UPI, Wallets, and EMI. For international users, Stripe accepts credit cards.
How do I confirm my payment?
After a successful transaction, your invoice status updates to Paid automatically in the Razorhost billing panel. You can also download the receipt for records.