
Razorhost SSL enables website owners to secure their domains with HTTPS quickly and easily. A valid SSL certificate not only protects sensitive visitor data but also boosts SEO rankings and builds trust with users. This detailed guide explains how to install a free Let’s Encrypt SSL certificate directly from your Razorhost cPanel in just a few minutes.
Why Razorhost SSL is Important
Modern websites cannot run effectively without SSL. Browsers like Chrome and Firefox now flag non-HTTPS websites as “Not Secure,” which reduces user trust and damages SEO. With Razorhost SSL, you get free, automatic HTTPS encryption across all hosting plans—no extra cost and no complicated coding required.
Step 1: Log in to Razorhost cPanel
Start by signing in to your Razorhost cPanel using your hosting login credentials. Once inside, you’ll find all tools to manage domains, email accounts, backups, and website security, including the Razorhost SSL management area.

Step 2: Access the Razorhost Security Section
Scroll down to the Security section of cPanel. Here Razorhost provides features like Hotlink Protection, SSH access, IP Blocker, and SSL/TLS tools for certificate management.
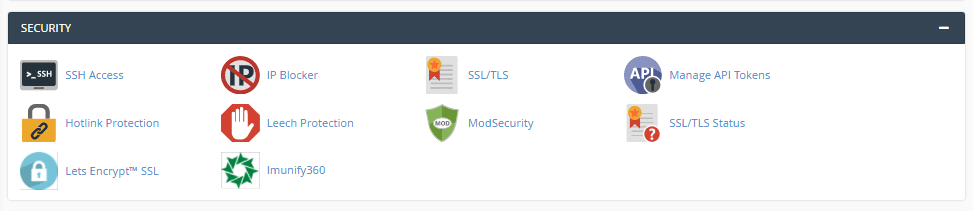
Step 3: Choose Let’s Encrypt SSL
Click on Let’s Encrypt SSL. Razorhost has built-in integration with Let’s Encrypt, a trusted certificate authority, to deliver free and auto-renewing SSL certificates for your websites.
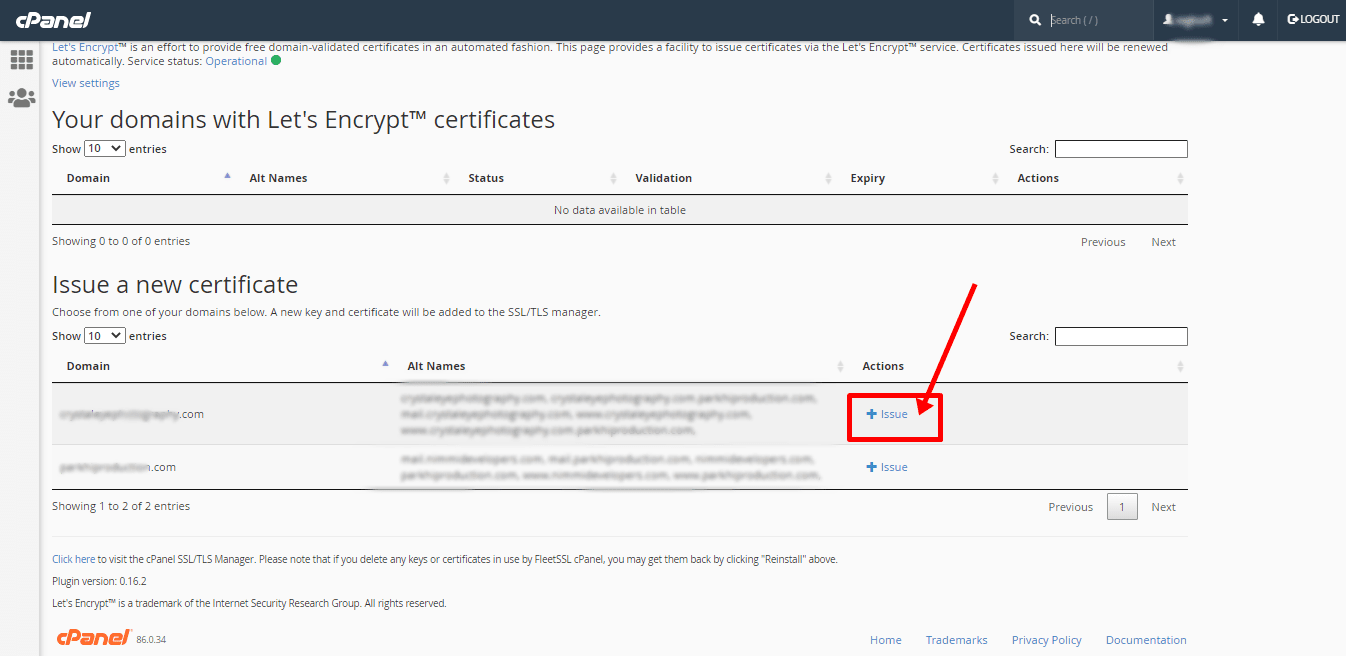
Step 4: Select Your Domain
From the domain list, choose the domain or subdomain you want to secure. For example, if your main website is www.example.com, select it and then click the Issue button to proceed.
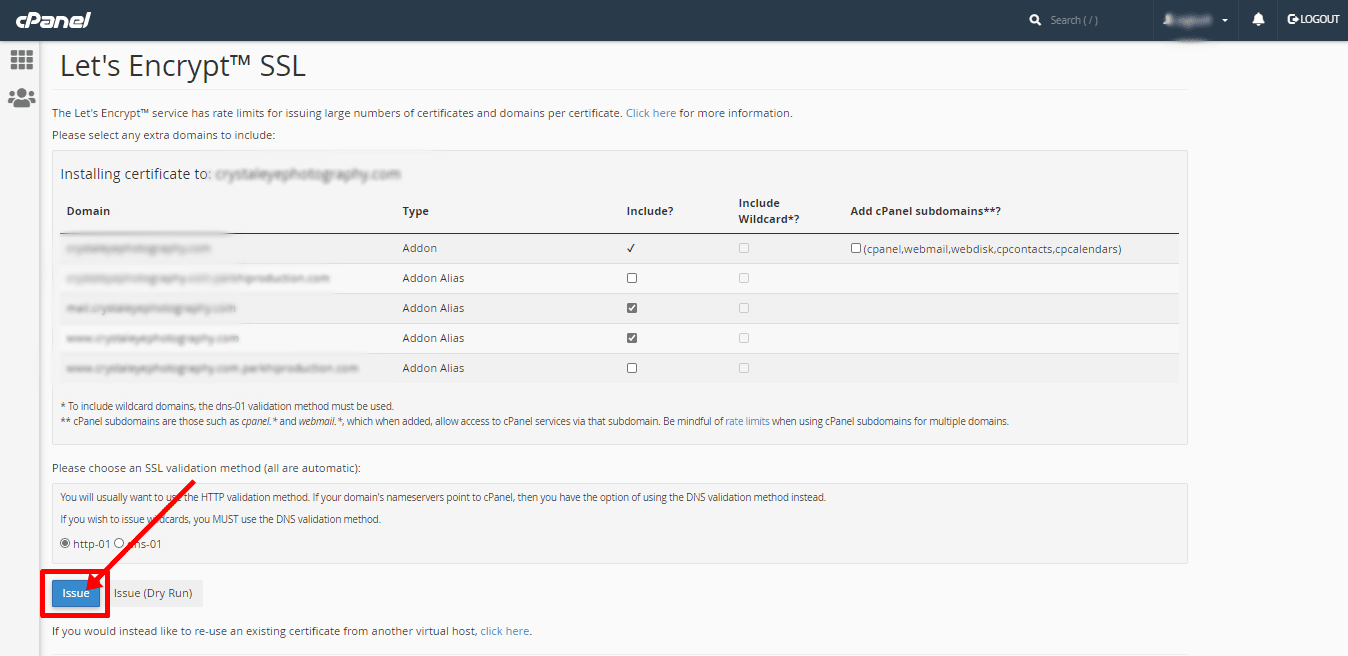
Step 5: Confirm SSL Installation
On the confirmation screen, press the blue Issue SSL Certificate button. Razorhost automatically configures your domain to run on HTTPS. You don’t need to edit .htaccess or perform manual changes.
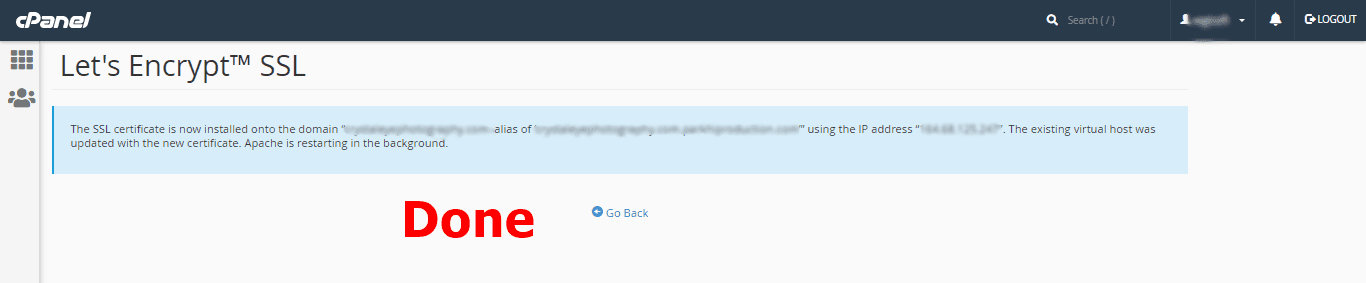
Step 6: Verify Razorhost SSL Installation
Once the process completes, open your website in a browser. If you see https:// in the address bar along with a padlock icon, your Razorhost SSL certificate is successfully active and protecting your site.
Top Benefits of Razorhost SSL
- Completely Free: SSL certificates are included with every hosting plan at no extra cost.
- Automatic Renewal: Certificates are auto-renewed, removing manual work.
- SEO Advantages: Google considers HTTPS a positive ranking factor.
- Improved Trust: Users feel confident when they see the green padlock.
- Data Security: SSL protects logins, payments, and sensitive information.
Why Choose Razorhost SSL Over Paid Alternatives
While many hosting providers still charge for SSL certificates, Razorhost SSL comes free with all plans. This saves money while ensuring your website benefits from secure encryption. Plus, Razorhost provides high-speed NVMe SSD hosting, global data centers, and 99.99% uptime. For businesses with growing needs, check out Razorhost VPS hosting with SSL for advanced scalability.
Frequently Asked Questions (FAQs)
Is Razorhost SSL really free?
Yes. Every Razorhost hosting account includes a free Let’s Encrypt SSL certificate.
Does Razorhost SSL improve SEO?
Yes. Google rewards HTTPS-enabled sites with higher visibility in search results.
Can I install Razorhost SSL on multiple domains?
Yes. If your plan supports multiple domains, you can activate SSL on each one from cPanel.
Conclusion: Secure Your Website with Razorhost SSL
Enabling Razorhost SSL is one of the fastest and most effective ways to protect your website. It enhances SEO, increases customer trust, and secures user data—all with just a few clicks in cPanel. Whether you run a blog, business website, or eCommerce store, Razorhost SSL ensures you stay safe and competitive online.